INTERACTIVE BATTLE
Battle of Sekigahara
21 October 1600 · Sekigahara
The decisive battle in Mino: Tokugawa Ieyasu’s Eastern Army defeats the Western Army.
Background
After Hideyoshi's death the struggle for control of the Toyotomi regime became a nationwide war. A month before Sekigahara, Ishida Mitsunari entered Ogaki Castle, the key stronghold of western Mino, and made it the Western headquarters to meet the Eastern advance. From the fight at Fukuzuka through the assault on Gifu Castle to the clash at the Kuise river the day before, the campaign turned on Ogaki. Tokugawa Ieyasu reached Okayama in Ogaki on the 14th.
Outcome
Kobayakawa Hideaki's defection broke the Western army, and the day was settled in about half a day. Otani Yoshitsugu took his own life; Ishida Mitsunari fled toward Mount Ibuki, was captured on 27 October and beheaded at Rokujogawara in Kyoto on 6 November with Konishi Yukinaga and Ankokuji Ekei. Shimazu Yoshihiro cut through the Eastern centre and returned to Satsuma, while the Mori forces on Nangusan never moved. The next day Ieyasu had Takenaka Shigekado bury the dead, and two head mounds were raised.
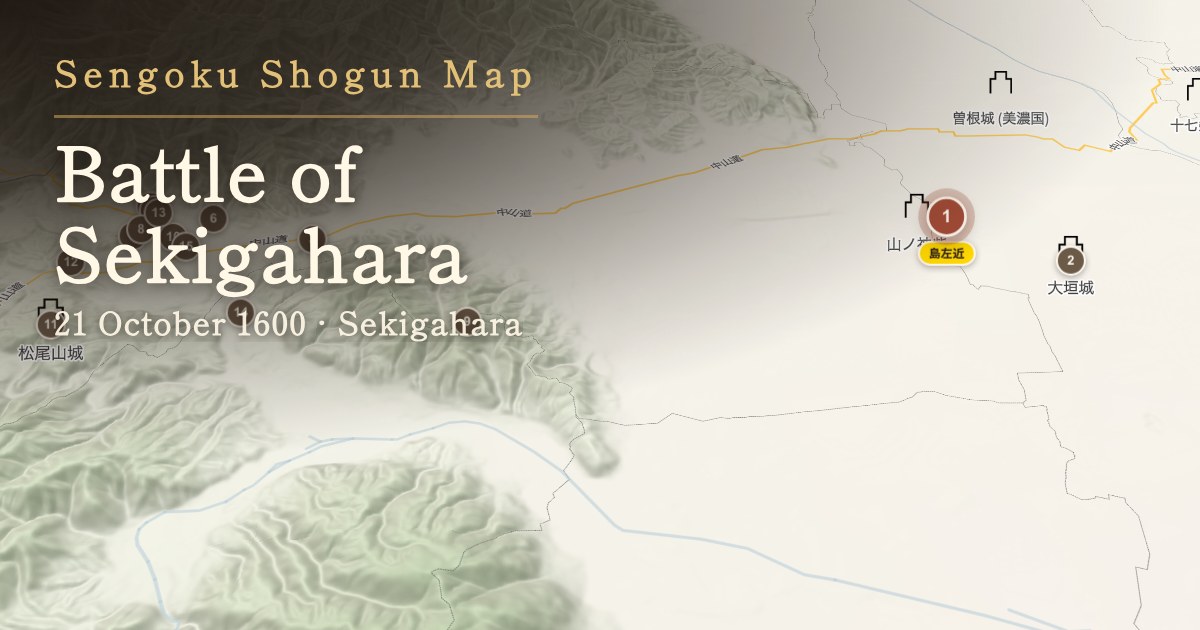
Course of the battle
1 20 October
The Western army wins at the Kuise river
Some 500 men under Shima Sakon and Gamo Bitchu left Ogaki Castle, laid an ambush, crossed the Kuise river and provoked Nakamura Kazuhide's Eastern unit, drawing it into the trap with a feigned retreat and defeating it.
Points of debate
Gifu Prefecture notes that the river has since changed course and the exact site of the fighting is not certain.
Crossed the Kuise river with 500 men and broke Nakamura's unit.
Sources356·Certainty: High
2 Night of 20 October
The Western army leaves Ogaki for Sekigahara
Mitsunari had entered Ogaki Castle a month before the battle and made it the Western headquarters; the campaign had turned on that castle. This night the army left for Sekigahara, with Ukita Hideie covering the rear—he is said to have been caught by Fukushima's vanguard during the night march.
Had made Ogaki Castle the Western headquarters.
Covered the rear on the march to Sekigahara.
Sources127·Certainty: Medium
3 About 6 a.m., 21 October
Ieyasu takes position on Momokubariyama
Ieyasu had reached Okayama in Ogaki the previous day, and around 6 a.m. deployed on Momokubariyama overlooking the Tosando road.
Deployed on Momokubariyama around 6 a.m.
Sources12·Certainty: High
4 Before dawn, 21 October
Both armies deploy across the basin
The Western army formed a crane-wing array with Ishida Mitsunari on Sasaoyama and Kobayakawa Hideaki on Matsuoyama; the Eastern army formed a fish-scale array in the centre of the basin with Fukushima Masanori at its point. Mori Hidemoto and Kikkawa Hiroie held Nangusan, watched by Ikeda Terumasa and Asano Yoshinaga.
Points of debate
The marked positions rest on identifications built on the work of Kamiya Michikazu, a Meiji-era local historian; they are not coordinates given by contemporary records.
Deployed on Sasaoyama.
Deployed at the foot of Sasaoyama.
Deployed on Kita-Tenmanzan.
Deployed on Minami-Tenmanzan with about 17,000 men.
Deployed with his nephew Toyohisa and some 1,500 men.
Deployed in Yamanaka facing Matsuoyama.
Deployed on Matsuoyama, 293 m high.
Deployed on Nangusan as Terumoto's deputy.
Deployed on the eastern side of Nangusan.
Deployed on Nangusan.
Took position on Nangusan.
Deployed on Nangusan.
Held the point of the Eastern array in the centre of the basin.
Deployed near the present Sekigahara station.
Deployed with Matsudaira Tadayoshi.
Deployed on Okayama with Takenaka Shigekado.
Deployed on Okayama with Kuroda Nagamasa.
Deployed west of Okayama.
Deployed behind the Eastern line.
Deployed at Tarui to guard against Nangusan.
Deployed near the Tarui milestone.
Sources12·Certainty: Medium
5 Morning of 21 October
The Ii unit breaks ranks and the battle opens
Fukushima Masanori held the Eastern vanguard, but Ii Naomasa—holding that the Tokugawa house should strike first—passed his flank with Matsudaira Tadayoshi and fired on the Ukita contingent, opening the battle.
Broke ranks with Matsudaira Tadayoshi and fired on the Ukita.
Broke ranks with Ii Naomasa.
Attacked the Ukita after being pre-empted.
Received the Eastern attack on Minami-Tenmanzan.
Sources12489·Certainty: High
6 Morning of 21 October
Signal fires carry word of the opening
Konishi Yukinaga raised a signal fire on Kita-Tenmanzan to tell the Western army the battle had begun, while Kuroda Nagamasa and Takenaka Shigekado raised the Eastern signal to attack from Okayama.
Raised a signal fire on Kita-Tenmanzan.
Raised the signal to attack from Okayama.
Was on Okayama with Kuroda Nagamasa.
Sources12·Certainty: Medium
7 Morning of 21 October
Shima Sakon is wounded below Sasaoyama
Shima Sakon held off the Eastern assault at the foot of Sasaoyama, but musket fire from the Kuroda unit wounded him and he left the line; the Ishida contingent was steadily pressed back.
Wounded by Kuroda musket fire and withdrew.
Fired on the Ishida contingent from Okayama.
Attacked the Ishida with the Kuroda and Takenaka units.
Sources12·Certainty: Medium
8 Morning of 21 October
The Shimazu contingent does not move
9 Morning of 21 October
The Mori forces on Nangusan stay put
Mori Hidemoto held Nangusan as Terumoto's deputy, but Kikkawa Hiroie—already in contact with Ieyasu—stood in his path and he could not move. Natsuka Masaie and Chosokabe Morichika likewise never engaged.
Could not move because Kikkawa and others were in contact with Ieyasu.
In contact with Ieyasu, he stayed in front of the Mori force.
Was left a spectator on Nangusan.
Withdrew to Minakuchi in Omi without engaging.
Never moved.
Sources12·Certainty: High
10 About 11 a.m., 21 October
Ieyasu moves his headquarters to Jinbano
Unable to read the fighting from the rear, Ieyasu moved his headquarters to Jinbano, directly opposite Mitsunari's position on Sasaoyama, and urged his troops on from close behind the line.
Points of debate
The story that he fired on Kobayakawa Hideaki from here to force his hand is passed down as one account among others.
Moved his headquarters to Jinbano.
Sources12·Certainty: High
11 About noon, 21 October
Kobayakawa Hideaki changes sides
Looking down on the field from Matsuoyama, Kobayakawa Hideaki resolved to go over to the Eastern side he had been in contact with; four more contingents, Wakisaka Yasuharu's among them, followed.
Sources12·Certainty: High
12 About noon, 21 October
The Otani contingent is destroyed
Otani Yoshitsugu, positioned directly opposite Matsuoyama, was attacked from three sides by Kobayakawa and Wakisaka. His contingent—which he directed from a palanquin because of illness—was destroyed and he took his own life.
Attacked from three sides; his contingent destroyed, he took his own life.
Had been entrusted with command at the front in Yoshitsugu's stead.
Crossed swords with the Otani contingent.
Fought the Otani contingent with the Todo unit.
Charged down on the Otani from Matsuoyama.
Sources12·Certainty: High
13 Afternoon of 21 October
The Western army breaks at the Kessenchi
Kobayakawa's defection turned the battle at a stroke. Eastern units pressing in on the Ishida and Shimazu filled this stretch of ground, the heaviest fighting of the day; the contest for the realm was settled in about half a day.
Overrun by the Eastern units, he fled toward Mount Ibuki.
Broke the Ukita and pushed forward.
Helped break the Ishida contingent.
Was routed and later gave himself up.
Sources12489·Certainty: High
14 Afternoon of 21 October
The Shimazu break through the Eastern centre
With the Western army broken, Shimazu Yoshihiro's men cut straight through the Eastern centre to find a way out. His nephew Toyohisa fought a covering action at Utozaka, and Yoshihiro reached Satsuma.
Broke through the Eastern centre and returned to Satsuma.
Fought the covering action at Utozaka.
Pursued the Shimazu with the Matsudaira and Honda units.
Pursued the Shimazu.
Sources12·Certainty: High
15 From 22 October
The head inspection and the head mounds
The day after the battle Ieyasu ordered Takenaka Shigekado to repair the damaged shrines and deal with the dead left on the field. Shigekado buried the bodies and raised two head mounds, east and west. The inspection of heads took place at Jinbano.
Held the inspection of heads at Jinbano.
Buried the dead and raised the eastern and western head mounds.
Ordered to find Mitsunari, he took him in the Ibuki mountains.
Sources12·Certainty: High
Historical significance
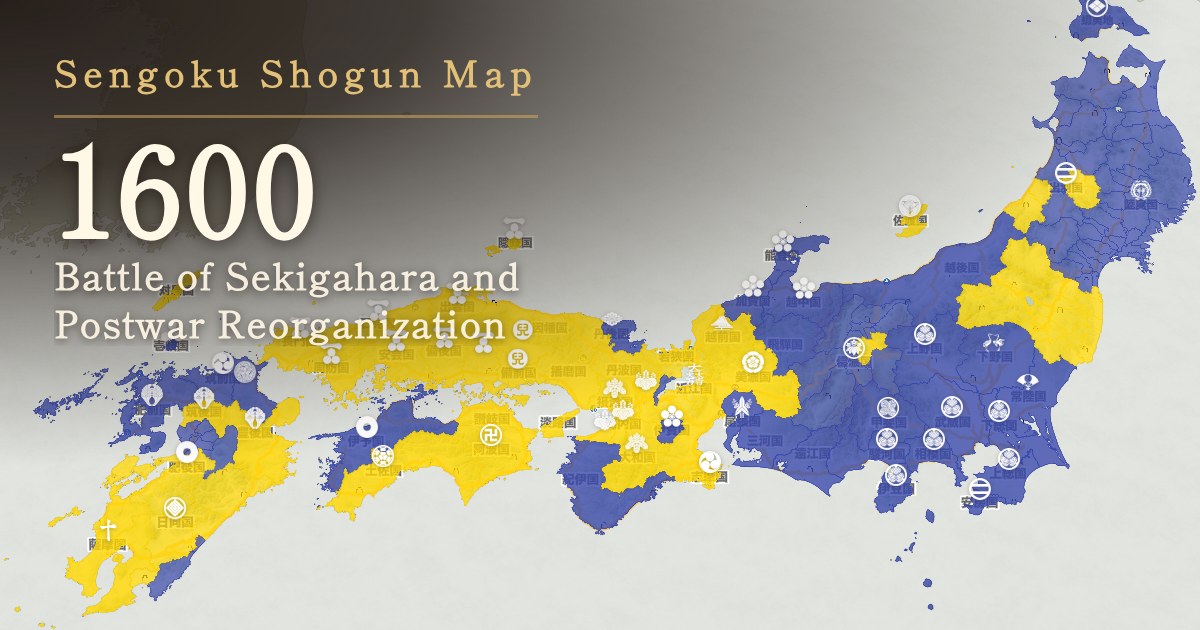
The battle is remembered as a single day that changed the realm, but it was the decisive point of a war fought across the country—at Fushimi, Gifu, Otsu, Tanabe, Dewa and Bungo. Toyotomi Hideyori remained in Osaka Castle, and the final reckoning between Tokugawa and Toyotomi waited until the Osaka campaigns of 1614-15. The confiscations and transfers that followed redrew the map of provincial lordship: by 1601 the Tokugawa regime held 66 provinces and the Toyotomi three.
Key figures
徳川方
13
Commander of the Eastern army
Reached Okayama in Ogaki on the 14th and deployed at Momokubariyama around 6 a.m. on the 15th, then moved his headquarters opposite Mitsunari's position around 11 a.m.
Sources12·Certainty: High
Vanguard of the Eastern army
Deployed near the present Sekigahara station and, with Ii Naomasa, broke ranks to fire on the Ukita contingent.
Sources12·Certainty: High
Vanguard and inspector of the Eastern army
Holding that the Tokugawa house should strike first, he broke ranks with Matsudaira Tadayoshi to open the battle, and pursued the Shimazu in the afternoon.
Sources12·Certainty: High
Leading unit of the Eastern army
Held the point of the Eastern army's fish-scale formation in the centre of the Sekigahara basin, and attacked the Ukita after the Ii and Matsudaira units pre-empted him.
Sources12·Certainty: High
Eastern army, Okayama position
Deployed on Okayama hill with Takenaka Shigekado and some 5,000 men, raised the signal fire at the outset, and wounded Shima Sakon with musket fire.
Sources12·Certainty: High
Eastern army, Okayama position
Shared the Okayama position with Kuroda Nagamasa, and the day after the battle was ordered to bury the dead and raise the two head mounds.
Sources12·Certainty: High
Eastern army
Attacked the Ishida contingent alongside the Kuroda and Takenaka units.
Sources12·Certainty: High
Inspector of the Eastern army
In the afternoon he joined the Matsudaira and Ii units in pursuing Shimazu Yoshihiro.
Sources12·Certainty: High
Eastern army
Fought Otani Yoshitsugu's units together with Kyogoku Takatomo, and is said to have been in secret contact with Wakisaka Yasuharu.
Sources12·Certainty: Medium
Eastern army
Helped break the Ishida contingent, and afterwards was ordered to search for Mitsunari, capturing him in the Ibuki mountains.
Sources12·Certainty: High
Eastern army
After the assault on Gifu Castle he deployed at Tarui to guard against the forces on Nangusan.
Sources12·Certainty: Medium
Eastern army
Having taken Gifu Castle, he deployed near the Tarui milestone to watch the Mori forces on Nangusan.
Sources12·Certainty: Medium
石田方
16
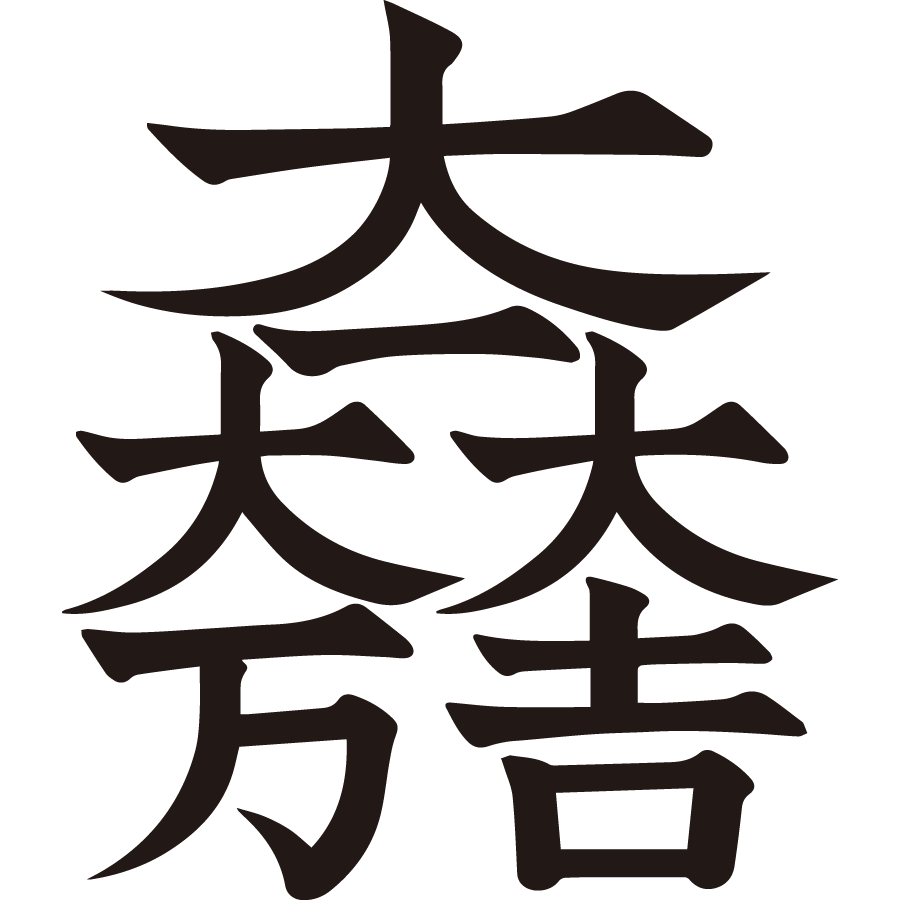
Core of the Western army
Deployed on Sasaoyama, which overlooks the field and commands the Hokkoku road; when the Western army broke he fled toward Mount Ibuki and was later captured by Tanaka Yoshimasa.
Sources12·Certainty: High

Commander under Ishida
Won the previous day's fight at the Kuise river with 500 men and held the foot of Sasaoyama, but was wounded by Kuroda musket fire and left the line.
Sources12·Certainty: Medium
Deputy commander of the Western army
Held Minami-Tenmanzan with about 17,000 men, the largest Western contingent, and had covered the rear on the march to Sekigahara.
Sources12·Certainty: High

Western army
Deployed on Kita-Tenmanzan and raised a signal fire as the battle opened; after the rout he gave himself up and was executed in Kyoto with Mitsunari.
Sources12·Certainty: High

Western army
Deployed in Yamanaka facing Matsuoyama and directed his men from a palanquin because of illness; attacked from three sides by Kobayakawa and Wakisaka, his contingent was destroyed.
Sources12·Certainty: High
Commander under Otani
Lord of Tarui Castle; he served under Otani Yoshitsugu and was entrusted with command at the front in his stead.
Sources12·Certainty: Medium

Western army
Deployed with his nephew Toyohisa and some 1,500 men, stayed on the defensive through the morning and refused Mitsunari's call for support, then broke through the Eastern centre and returned to Satsuma.
Sources12·Certainty: High
Western army
Yoshihiro's nephew; he covered the retreat and fought the Eastern pursuit at Utozaka.
Sources12·Certainty: Medium

Turned from the Western to the Eastern army
Deployed on Matsuoyama, 293 m high, and resolved to go over to the Eastern side he had been in contact with; the Western army collapsed from that point.
Sources12·Certainty: High
Turned from the Western to the Eastern army
Approached beforehand by Todo Takatora, he changed sides with three other contingents once Kobayakawa turned.
Sources12·Certainty: Medium
Western army, Nangusan
Deployed on Nangusan as Mori Terumoto's deputy, but could not move—and so could not join the battle—because Kikkawa Hiroie and others were in contact with Ieyasu.
Sources12·Certainty: High

Western army, Nangusan
As the senior figure of the house he opposed Mori participation on the Western side, and deployed on Nangusan after secretly reaching Ieyasu.
Sources12·Certainty: High

Western army, Nangusan
He had a hand in making Mori Terumoto the Western commander-in-chief; unable to move from Nangusan, he was beheaded after the battle with Mitsunari and Yukinaga.
Sources12·Certainty: Medium
Western army, Nangusan
He marched from Ise into Mino and took position on Nangusan, but withdrew to his domain at Minakuchi without engaging.
Sources12·Certainty: Medium

Western army, Nangusan
Deployed on Nangusan as part of the Western main force, but never moved.
Sources12·Certainty: Medium

Commander-in-chief of the Western army
Raised as commander-in-chief of the Western army, he remained in Osaka Castle and never took the field at Sekigahara.
Sources12·Certainty: High
Other events of 1600
Notes on the data
The sources date the battle to the 15th day of the 9th month of Keicho 5. The Gregorian date is anchored on the verified 21 October 1600, and other days within the same lunar month are converted by the same offset. The marked camp sites are identifications made from the Meiji period onward.
Sources consulted
- 岐阜関ケ原古戦場記念館「古戦場・史跡巡り」
- 岐阜県観光公式サイト「岐阜の旅ガイド」
- 大垣市「市指定史跡 関ケ原合戦岡山本陣跡」
- 岐阜県「岐阜関ケ原古戦場記念館」
- 岐阜県観光公式サイト「杭瀬川古戦場」
- 大垣・西美濃観光ポータル「関ケ原合戦 決戦前夜 大垣城」
- 城郭マスタ(shiro.geojson)
- 関ケ原観光ガイド「開戦地」
- 関ケ原観光ガイド「決戦地」
- 国土地理院 住所検索
The numbers in the text refer to the list above. Certainty indicates how far a statement is supported by the cited sources; it does not refer to the precision of the coordinates or the dating.
Advertisement